Frequently Asked Questions
Adding a network printer to a workstation.
Staff members can add network printers to workstations by double clicking the "Install Printers" icon on the Novell screen.
Follow these steps to install a printer.
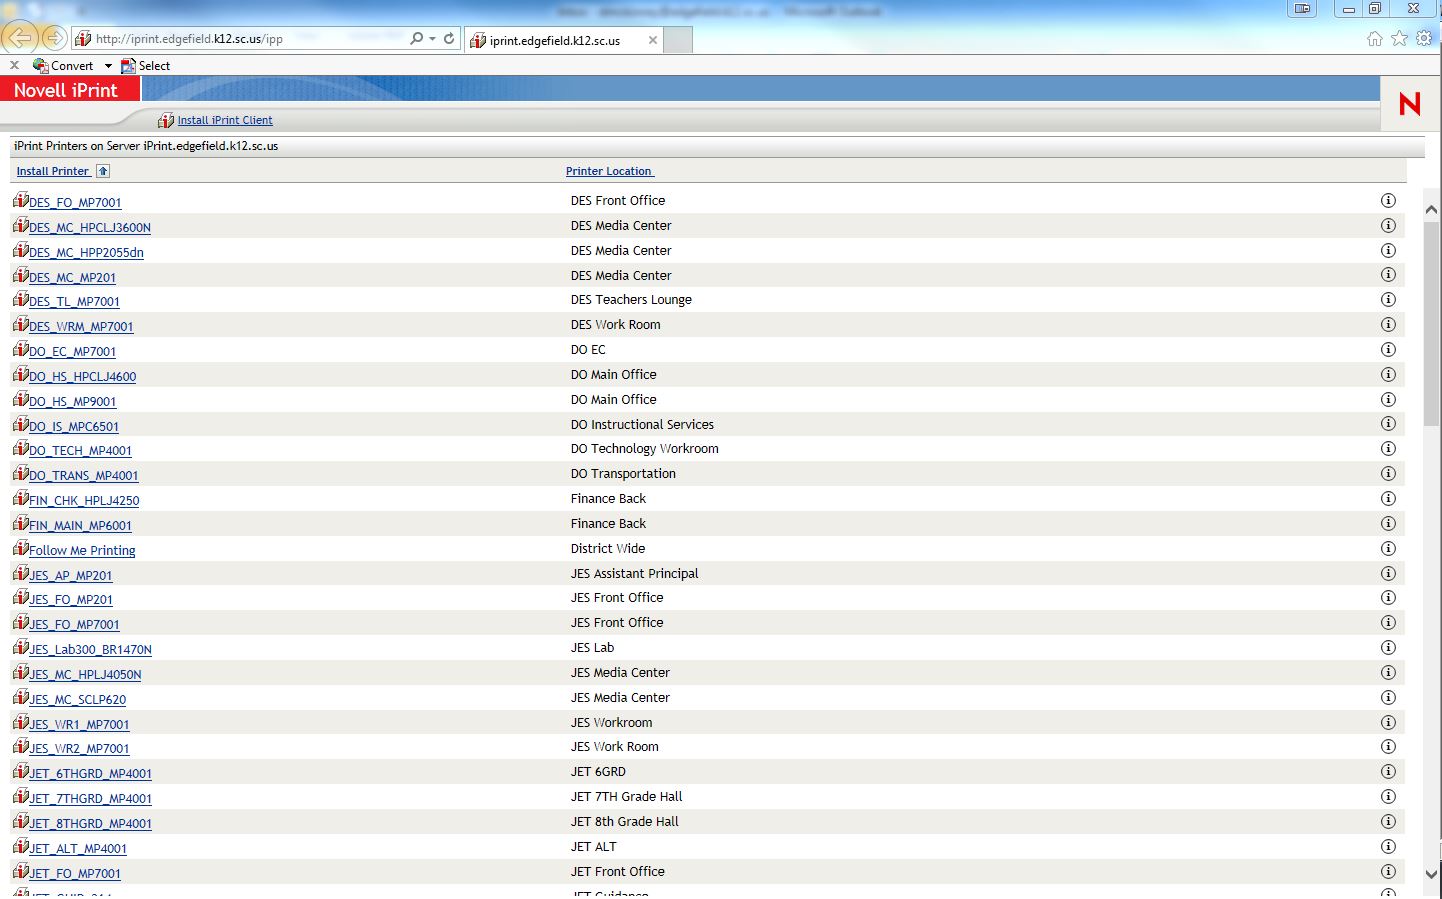
- Click on the install printers icon on the Novell screen. Or run internet explorer as administrator by right clicking the internet explorer icon and selecting run as administrator from the drop down menu. Then type in the url http://iprint.edgefield.k12.sc.us/ipp and go.

- Find the printer that you need to install and click on the blue underlined name of the printer.
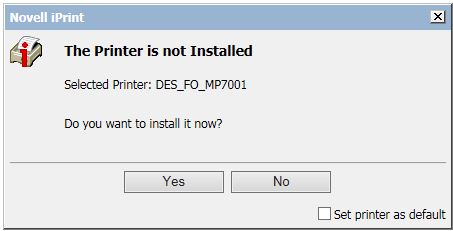
- Select yes to install the printer.
- If you get a message that says the iPrint client is not installed first check the compatibility view is enabled for k12.sc.us. (See instructions below for enabling compatibility view.)
- If compatibility view is enabled follow the instructions below to install the iPrint client.
To install iPrint Client:
- Select the Install iPrint Client icon at the top of the iPrint page.

- Select run to start the installer.

- Select next to run the installer.

- Select finish when the install completes.
- Restart internet explorer and try to install the printer again.
To enable compatibility mode in internet explorer for "k12.sc.us:"
- Click on the settings icon in internet explorer.

- Select compatibility view from the drop down menu.
- Click the add button to enable compatibility view for k12.sc.us
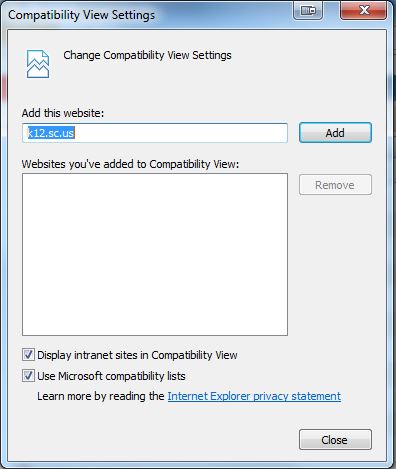
- Close the tab and try to reinstall the printer.
Follow these steps to install a printer.
- Click on the install printers icon on the Novell screen. Or run internet explorer as administrator by right clicking the internet explorer icon and selecting run as administrator from the drop down menu. Then type in the url http://iprint.edgefield.k12.sc.us/ipp and go.
- Find the printer that you need to install and click on the blue underlined name of the printer.
- Select yes to install the printer.
- If you get a message that says the iPrint client is not installed first check the compatibility view is enabled for k12.sc.us. (See instructions below for enabling compatibility view.)
- If compatibility view is enabled follow the instructions below to install the iPrint client.
To install iPrint Client:
- Select the Install iPrint Client icon at the top of the iPrint page.
- Select run to start the installer.
- Select next to run the installer.
- Select finish when the install completes.
- Restart internet explorer and try to install the printer again.
To enable compatibility mode in internet explorer for "k12.sc.us:"
- Click on the settings icon in internet explorer.
- Select compatibility view from the drop down menu.
- Click the add button to enable compatibility view for k12.sc.us
- Close the tab and try to reinstall the printer.
Last updated Tue, Feb 2 2016 10:55am